
A rather long winded post about the ACW gaming
Since my ACW purchase and completing the latest CSA troops (see some previous posts HERE and HERE ) I have been itching to do some ACW gaming. It’s been awhile.
Side note: Hosting games is hard
So I squeezed a game night into the schedule and invited
people over; proving my earlier post about October being the beginning of the
end of gaming for the year; for at first I had 5 players saying maybe, which
all started to cancel, and overall
the number steadily declined to 2 (not counting me), of which 1 cancelled
15mins before game time…. Maybe this
means I’m a terrible game host and no one wanted to come? Maybe it’s because I serve gluten free
pizza…. Maybe it's because while at home I game in the nude and do yoga stretches in-between turns...... But if I had known it’d be just
me and Mr. L, I might have chosen a different game / scenario. Oh well.
Soldiering on:
I’ve wanted to play the scenario ‘Caldwell clears the
Wheat field’ from the Regimental Fire and Fury (RFF) scenario book for a while
now. It’s too bad that the second day of
Gettysburg gets short shrift when it comes to press coverage, and most of that
is given to little round top (Even though we all like Chamberlain). but I mean cmon; the 2nd day assault by
Longstreet on the salient created by Sickles was way larger and more dramatic
than anything Pickett did, with the added bonus that Longstreet actually had a
chance of victory. The fighting into and around the wheat field
has always been interesting to me.
 |
| Serious map of the action stolen from the internet |
The scenario is good for 4 players, and as you can tell
from the title it focus on the counter attack of General Caldwell into the
wheat field where the CSA have just broken through! I also wanted to see if this would make a
good convention game (I was originally planning on going to a local small con in
November but plans since have changed).
It’s a small little game, only 3 x 4, about 65 stands each…
 |
| Scenario Map from the book |
Here is the scenario map from the book. Now some of the challenge of doing
historically based scenarios is that you’ll need specific terrain items. Like in this case, the wheat field, an oat
field of a certain shape, and some streams.
All items I didn’t have, so in the week or two before the game this
became my focus.
Setting up the Scenario:
What follows is how I set up ACW games. I really like blog posts that go into details
about how they create the games, and have gotten several tips and ideas from
such posts. So here I offer up for
display ‘how I do it’ so if someone finds it helpful then that would be
awesome. ALSO! If someone wants to offer up suggestions for
improvements that would be… awesomer?
awesome again? It’d be more
awesome. I also talk about minor things
I would do differently next time.
For the Wheat field, I went with some teddy bear fur,
mainly because I had it laying around from previous projects. I don’t really love this teddy bear fur for
fields but haven’t really found another suitable material yet…
Anyway, real easy, just draw and cut out the shape you
want…


Or not so easy, as I did this backwards; as in I drew the
shape that I wanted on the back side of the fur, so when I flipped it over I
got the mirror image : / so I had to do it over again using smaller
pieces which is why in other pics the wheat field is in two pieces…. While I was setting up the game I also made
it a little small. So sometime I’ll make
it again and larger.
For the streams, I used a technique that I read about on
the RFF forum. You get some Acetate
sheets and spray paint one side, and the other side shows the color but with a
shiny gloss that water would have. I got
some Acetate sheets from Staples (they sell these in large packages of a
hundred which are pricey, but if you go to the copy center they’ll sell you individual
sheets).
 |
| Spray painting in my backyard... |
 |
| and I somehow did 2 different browns for the streams... |
You then cut the acetate sheets into little hotdog /
sausage links and lay them down to make a stream in any fashion you like. Then add bits of flock and what have you to
make it look better and more like a stream rather than pieces of sausage shaped
acetate.
I used brown because that’s what the example I had used,
and I had brown paint already. I don’t
know if brown was the best choice actually.
It might be more realistic to have brown streams, but I think we’re
trained to think blue when we think water.
For the oat field, I sacrificed an old brown towel,
making sure to cut it correctly this time… and hit it a few times with spray
paint to break up the textures. I
actually think this came out OK and now will be on the lookout for more appropriate
colored towels…
And lastly the night before, I printed up all the troop labels
that RFF uses, taped them onto bases, and organized them into commands for easy
deployment.


On With the Game Already
So the day off I went about building the board. One of the main reasons I made wargaming
matts is so that I can put hills underneath and lay the mat on top of it. Theoretically this will enable me to create
any geography that I like. It doesn’t
quite work perfectly, but overall it does the job. Since 15/18mm ACW stands are very light, you
don’t need to use to foam or hard materials to make the elevations like you
would with metal 28mm figures / units.
So again I use a mixture of towels and old moving blankets.
Step 1! mark out the game area with some tape, and lay down the towels and such where you think the elevations will go. I like to pick a corner and go out from there adding hills as I go.

 |
| This pic is rather exciting... |
Step 1! mark out the game area with some tape, and lay down the towels and such where you think the elevations will go. I like to pick a corner and go out from there adding hills as I go.

Step 2! Lay you
wargame mat over it, and press down firmly on the depressions. I put some white poker chips down were the
corners of the game area are.


Pictures never really do a good job showing the
elevations when taken from above, so here’s a shot from more eye level that
really shows the elevations.


Step 3! Start laying down the major land marks and adding
scenery. Reach under the matt and pull
the hills hither and thither as necessary.
Add first the things that are easy to pick up and those items that
anchor the rest, in this case the road and streams. Then the fields, fences, troops and trees and
rocks (you put the trees and rocks on after the troops so you don’t have to
move them to place units where they’re supposed to be).
 |
| Daughter#1 surveys the scene. She likes the little trees. |
Step 4! Guard you set up from curious little hands that
want to touch everything and ruin it while at the same time instilling a love
for wargaming.
However! There’s no way to have generic do all terrain and have an exact historical terrain. So really the best we can hope for is a good-enough fit. So let’s see how we did:
However! There’s no way to have generic do all terrain and have an exact historical terrain. So really the best we can hope for is a good-enough fit. So let’s see how we did:
 |
| Not too shabby. |
All this took over an hour to do, but that will decrease
with practice effects. The first time I
did the Brawner’s farm scenario it took forever to set up but by the 5th
time I had it down pretty quick.
So; here’s some more self indulgent shots of the set up….


Game / battle report…On with it already.
So Mr. L took the CSA and I took the USA simply because
there were 4 brigades on the union side versus 2 on the CSA.
The goal is for the Union to push the CSA out of the
wheat field’s lower stone wall and off of the Stony hill (markers X, Y, and Z
on the scenario map) for one victory condition, and another if the USA get a
unit past the fence at V –W. The CSA get
the victory conditions if they hold it.
There’s also a victory condition of causing heavy casualties to the
other side. Game lasts 7 turns.
So I girded my lions and did my best impression of
‘relentless advance.’
Quick summary: The union succeeded in pushing the CSA out of the wheat field past the stone
wall, and withstood the CSA trying to push back into it; and in the end Luffman’s
brigade was mostly broken units. However,the Union never really succeeded in getting the rebels out of the woods on Stony Hill;
just when they looked like they were going off they rallied and counter
attacked. The USA did succeed in
inflicting heavy losses on the rebs without taking heavy losses themselves
(though just barely). So in total the
USA had 1 victory point and the CSA had 2 for holding the field. Rebel victory!
So I was playing and running the game so there aren’t too
many pictures… that is something of a lie.
First half: USA;
General Cross (already in the Wheatfield) went straight toward the stone wall,
while Zook’s brigade (behind and off the right) angled toward the Stony
hill. General Kelly moves to be in-between
Zook and Cross, and General Brook comes onto the field with his brigade
searching for a hole…. The CSA stand
firm and bring up they’re two hindmost regiments and give a blistering fire to
the advances Union troops
(The first 5 rolls for shooting that Mr. L did were a
7,9,10,8, and 9 on a d10…)
 |
| Early Union moves |
 |
| The Union advancing onto Stony Hill |
 |
| 'Advance through the field me boys!' |
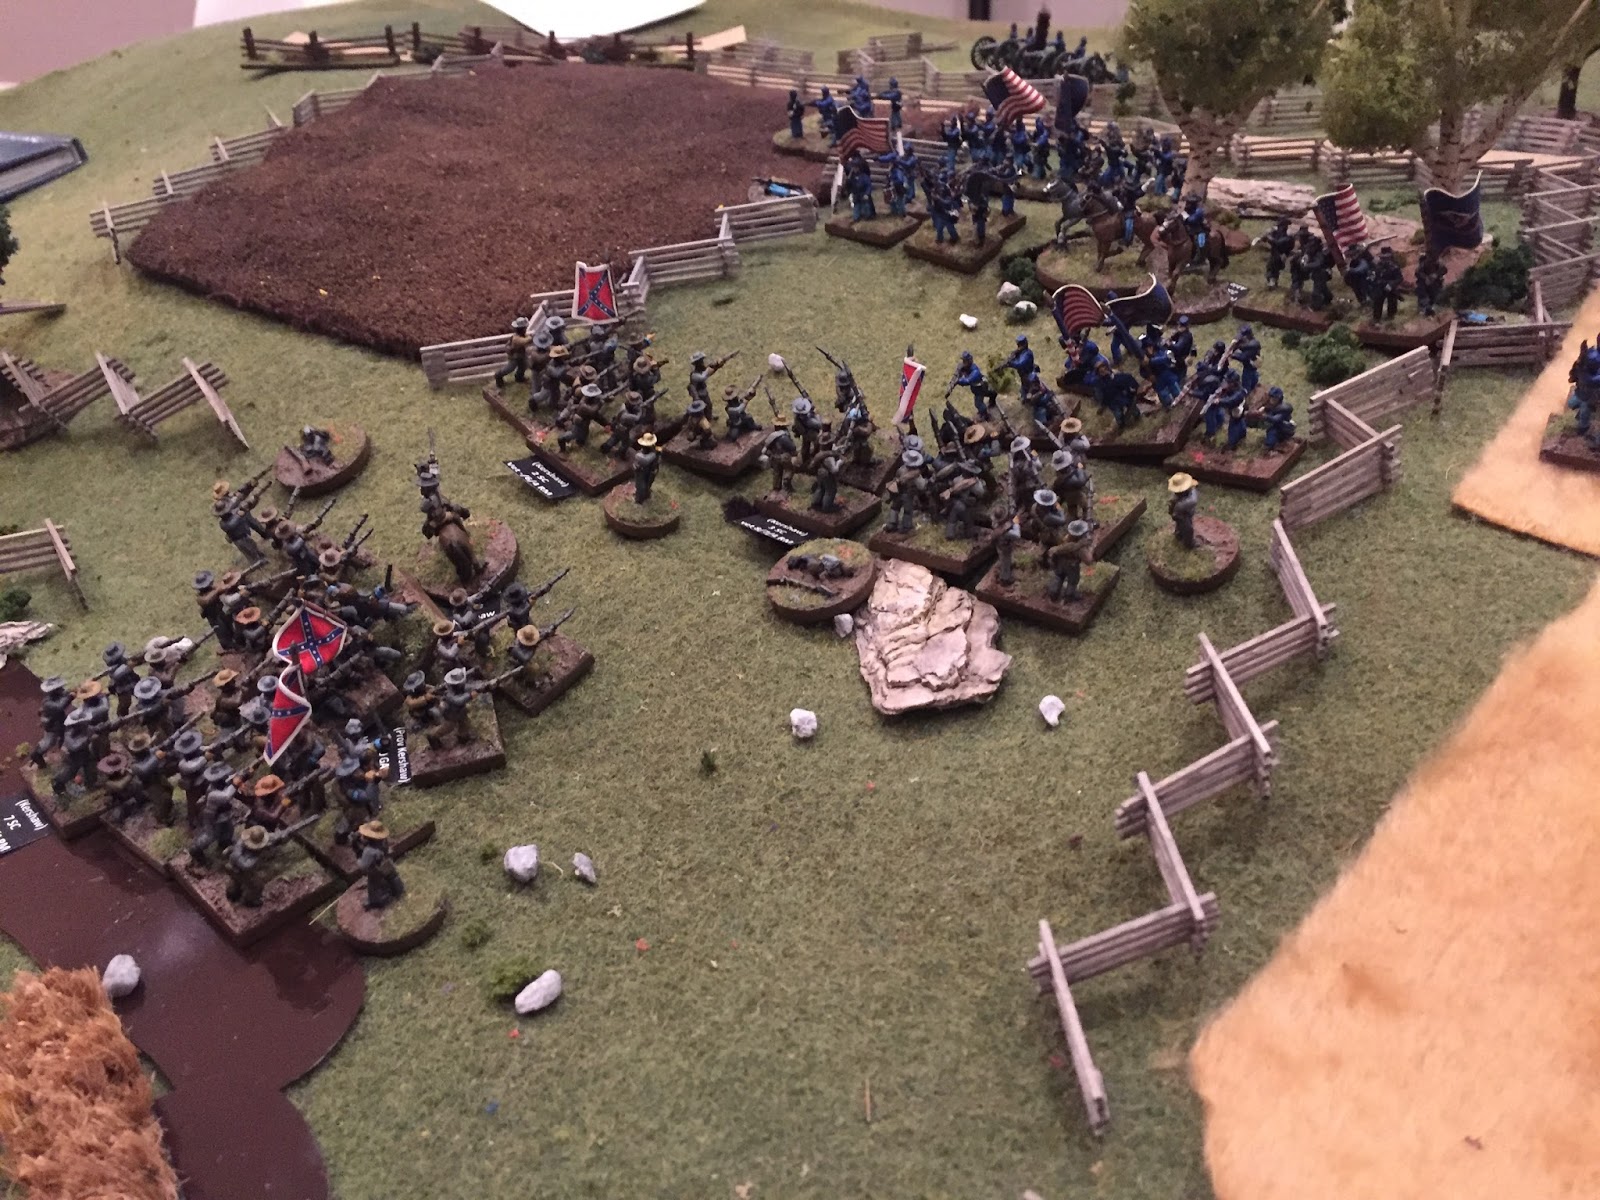
And basically a huge epic struggle ensues… (in 15mm)
 |
| Mid game struggles... |
 |
| Attacks and Counter attacks... |
Luffman’s rebel brigade is forced to fall back but
Kershaw’s CSA brigade is bolstered by reinforcements and stalls the advance of
the Union brigade under Zook on the Stony Hill.
Union Generals Cross and Kelly continue to face Luffman
whose still dangerous, so can’t turn on the flank of Kershaw, who swings out a
regiment in the USA wake to face the oncoming USA general Brooke; who gets thrown back like a fish too small to even be used as bait.
End phase:
due to losses, most of the CSA troops fighting in the Wheat field break and run, leaving the Union in charge of the field and the stone wall. However Stony Hill is firmly in CSA hands. the game is 7 turns long (represents 3.5 hours)
 |
| 2 of Brooke's regiments are thrown back in a surprise upset defeat.. |
 |
| Though the Union rallies though and pushes through the Wheat Field |
End phase:
due to losses, most of the CSA troops fighting in the Wheat field break and run, leaving the Union in charge of the field and the stone wall. However Stony Hill is firmly in CSA hands. the game is 7 turns long (represents 3.5 hours)
 |
| End state of the game |
 |
| CSA advancing up the Stony Hill near the end of the game, when they SHOULD be retreating... |
 |
| (reverse angle) |
Thoughts on the scenario and wrap up..
That IS a fun scenario. Took us about 4.5-5 hours to play, which is about right for a convention game in my book. There is just enough maneuver to be interesting but it's really the bare minimum, and the action starts right away.Improvements for next time: the Wheat field needed to be about 2" bigger and the angle of the stone wall less steep. More important: there is a 4" section of ground in the middle of Rose woods that is not wooded (see scenario map) that needs to be more obvious on the game table. Lastly, in the pure scenario some units have smooth-bore muskets, which we all forgot about; probably just make every unit armed to rifle muskets to avoid confusion.
I'm likely to run this scenario (or at least one based largely on it) at a convention or again at my place. If anything to practice setting out the terrain again.
Hope you enjoyed this long post! Thanks for reading.
Very interesting reading the total story of a scenario from conception to table top to lessons learned.
ReplyDeleteIts very disappointing to hold a battle and no one attends :). Gluten free pizza and nude yoga might require your further study.
Other Stewart
Glad it was interesting. I’ve always liked it when others have shown how they do stuff like that.
DeleteIn my heart I think it was all just scheduling. 2 of my usual game buds already had family plans, and my two local clubs each had a meeting scheduled for the weekend before and weekend after, neither of which I could make due to my schedule...
Thanks for putting all of this together into one post, I enjoyed the read and also the terrain techniques.
ReplyDeleteI can tell your a man of excellent taste just from your icon. 😀.
DeleteTechnique is a strong word for anything that I do, but those missteps are how we learn.
Excellent post. Terrain can be so tricky....you did a great job!
ReplyDeleteThank you, it did come out alright in the end. It’ll even be better next time because of the practice. Thanks for comment!
DeleteFeel bad for missing this one...
ReplyDeleteBut it was fun to follow in your post. Looking forward to an ACW where all of your mini collection is utilised!
As you should... 😀
DeleteNo worries. We’ll get in a game together soon. Glad you liked the post though. We’ll just make sure the next big ACW game also works with your schedule.
Nice post, very informative, your mat looks really good, I'm torn between having based boards (I already have one and am planning a second /third one for my new space once I've got rid of all the crap thats in it at the moment ) or doing a mat based on your guide, I think I'll probably do both and mark the mat up for You the Strongest which is based on grids that I could do with dots.
ReplyDeleteThe game looks great too, I don't have that big a group to game with but usually we can tie people down but have to have a whats app group to organise it! Oh and loved the fencing too.
Best Iain
They both have their pluses and minuses. Glad you thought the game looked good.
DeleteWhile I didn’t get as many players as I’d hoped, it was still gaming and a good time.
A great post, what a wonderful battlefield with beautiful armies...and lovely maps!
ReplyDeleteThanks for the comment and I’ll m glad you liked the post.
DeleteQuite a long post, but I really liked how your terrain turned out. The river/stream segments seem a bit dark to me, but I am sure that in person the glint of the acetate surface would add to the effect.
ReplyDeleteLooks like your #1 helper is about the age of my #2 helper, so I am impressed that you are able to do anything hobby related during daylight hours! If I tried, I would have a number of breakages and probably figures "going to the doctor" with bandages wrapped up on them.
Thanks! I agree and if I get around to doing it over I’ll likely just use blue, but who knows when that will happen. 😀
ReplyDeleteLittle helpers do like to ‘help’. I sometimes put durable stuff within reaching distance that she can move around. But gaming does mean I need to get impose on the wife for child care, which is why I can’t do it too often.
What a great report Stew and highly entertaining to boot. What more could any wargamer ask for. I too like the entries where the step by step of how things were arrived at in terms of preparation and couldn't help but laugh at your teddy bear shaped cutting exploits as it does sound all too familiar. Lovely looking game and I look forward to reading more on your blog in coming weeks. Cheers and all the best.
ReplyDeleteThank you very much Carlo. It makes me feel good that you found the post informative and entertaining, as that’s what I’m aiming for by posting in the first place. Thanks again 😀
ReplyDelete