Wednesday, July 26, 2023

McPherson's Ridge Part 5 (The Fields and Woods)


OOOOOOOOOOOoooooooHH,
The ACW
is the BEST CW,
by now, you already knew.
Since the ACW
is the best CW,
go on and buy a few! 
(hundred miniatures).


Now we're getting close to finally finishing this song, and the battlefield. Not sure which is more important.  


Even More McPherson's Ridge


With the elevations complete the general landscape had been formed, as seen here in part FOUR
Now it's time to get some things to put on top of that landscape.  'The hills are alive' with adequately painted miniatures and terrain.
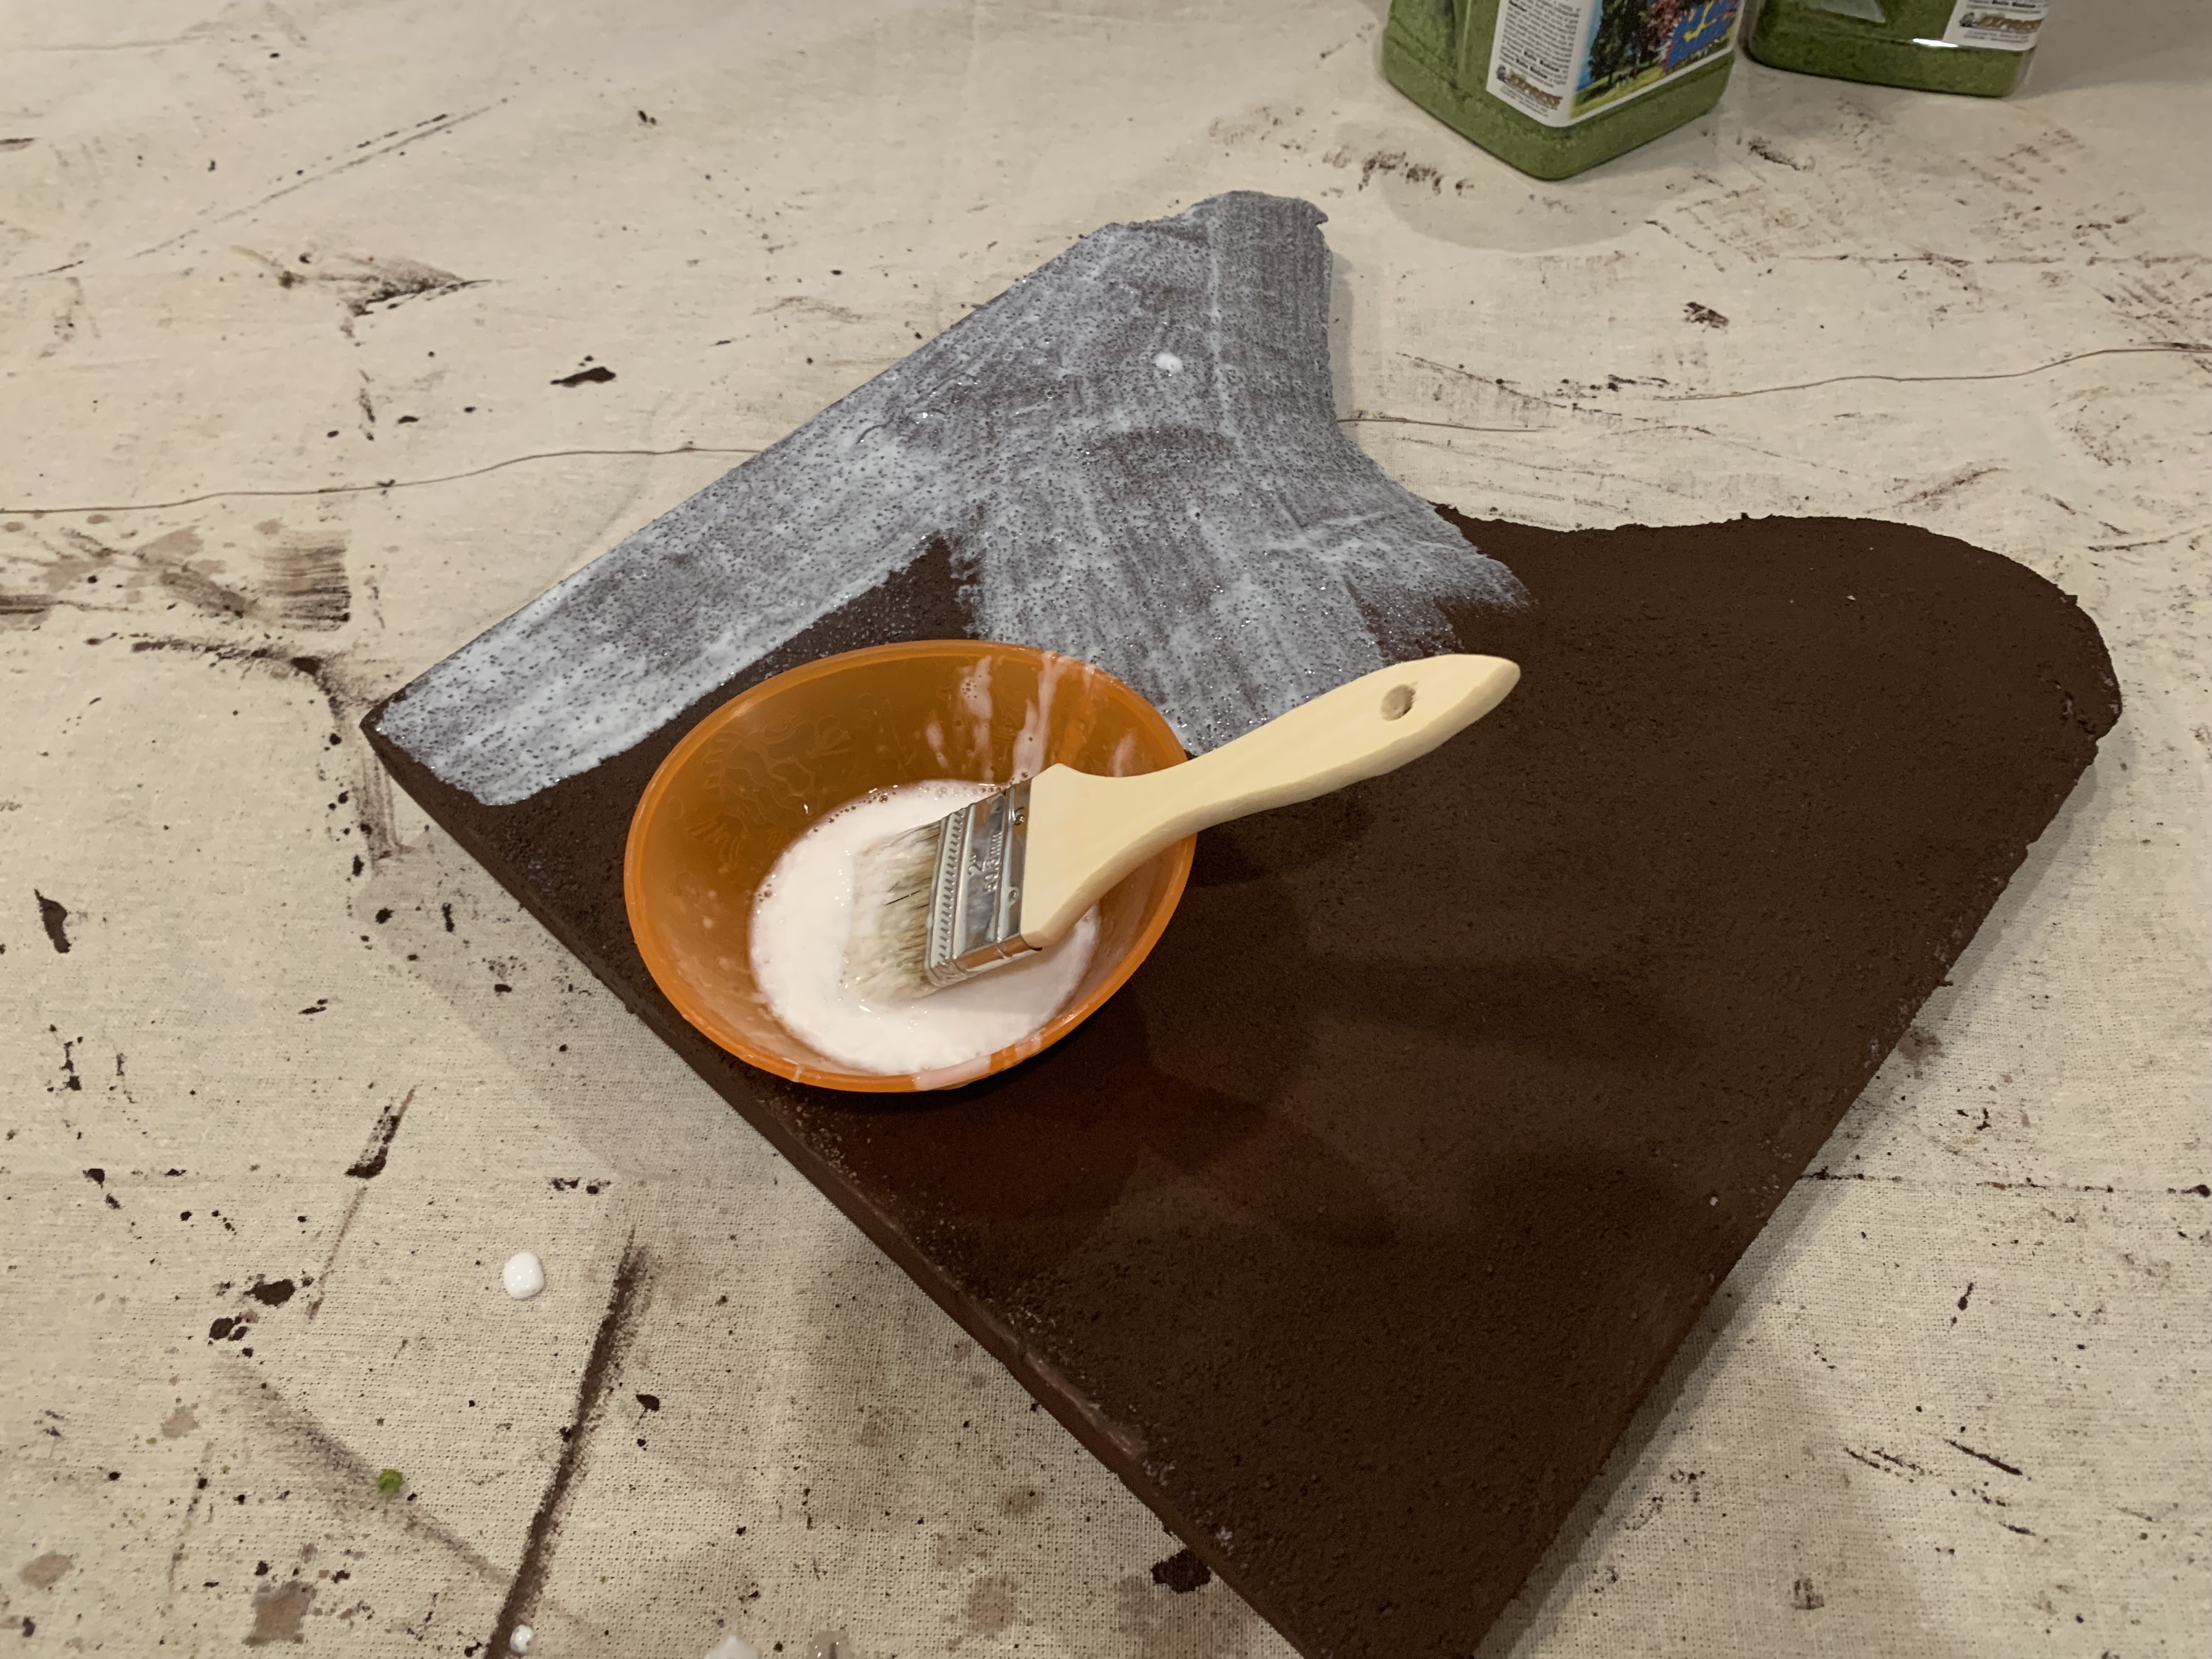

Railway Bed


Cutting through the board is an unfinished railway, so I needed a track bed.  My idea was to make this visually different from a road but since there aren't any tracks on it, it's basically a road. 

Notice the creases, I didn't think they would matter.


The track doesn't need to be flexible as it just cuts through all the hills like a hot knife through butter or my wife through my bullsh...  anyway it just goes straight across.  The battlefield is 5 feet across so I took my heavy felt and cut two strips 2" wide and 30" long.  (30 + 30 is 60 and 60" is 5 feet. Don't question me maths).


I gave the strips a liberal coating of watered down white glue and then coffee grounds from cheapo decafe coffee that NO ONE should be drinking anyway.  

Let dry thoroughly which only took about 10 mins because here in the Sacramento area it is 104 degrees outside
every
single
day.


Dammit, you can still see the creases.
Next time I'll have to iron it.
but it's risky to remind the wife that I know how to use an iron.


Lastly, the things were primed with black and then given various dry brushes of browns and what not.
Came out OK in the end.  I don't LOVE them like I love a good tax refund, but acceptable.  And I gots to move on as I am on a deadline here.


Fields of Frustration


The battlefield is covered in several wheat fields.  I'm not really interested in getting every field and fence shown on the scenario map, especially since wheat fields don't affect game play.  I just need enough to look pretty.  Like someone wearing juuuuust the right amount of make up.  

I've seen some cool fields made out of teddy bear fur, so I wanted to give that technique a try.  For a good walk through of the process you can do no better than this ONE from our online friend The Tactical Painter.  


As seen way back in part 3 of this build, as no doubt you have committed the whole post to memory because of it's awesomeness, I've already played around with the scraps of teddy bear fur I had...

Original color on the left, altered product on the right.


But what you see above is all I had.  And I've had that stuff for a few years.  For love and ruin I could not find anymore.  I went to 2 different Joanne's Fabric stores and didn't see what I wanted.  yes I asked for help.  If I'm a man in a fabric store I might as well go ALL IN and also ask for directions...
I could find fur there, for sure.  They showed me where the fur was, but I wanted fur with really short hairs cuz I don't want to have to shave it.  I told the lady that I like my teddy bear fur like I like my women's skirts, SHORT.  She told me I was in the wrong store.
And then I had to leave.


I'm pretty sure I got it this original stuff from hobby lobby but can't quite remember and hobby lobby is  a long drive away and I am low on time due to super family summer activities.  I tried online and ordered: 

This is not quite the same thing as teddy bear fur.
but it's close.
Like a kiss on the cheek is close to a kiss on the mouth, but are very different.


Other online searches didn't really help either so had to settle for I got.  All this has to be done by the end of August and I am not made of time.  I am made of left over pizza and hotdogs.


Field Construction followed what every other tutorial ever said...

Cut the not-teddy bear fur into the shape you want,
then comb the hell out of it.
Comb it like the hair of your children when they won't sit still.


With wet-ish dry-ish brush, paint on the main color.  I went with a bright yellow.
Wheat is yellow right?  I dunno, I've never seen wheat that wasn't already bread.
Take the comb and comb the paint all throughout the not-fur-but-close-enough-to-fur.


I also added in some spots painted with a flesh tone,
to give some variation.
Again hit it hard with the comb. 


repeat process as many times as desired.  


taaadaaa!
If the text box doesn't show, the top right is the original color.
I added a burnt spot to one field just to see how it looked
by using black paint and not combing it out.


All in All I actually think they came out pretty good in the end, despite being frustrating in the beginning, trying to nail down the proper materials.  These are the right height for my 15/18mm miniatures at any rate and look very wheat field-ish to me.


There's also a large field on the scenario map marked 'stubble.'  For that field I am gonna use this material that I've been using for my corn field bases.


You can pick this stuff up at Michaels around Halloween. Be warned though, this stuff sheds like crazy.  Sheds like the dog I'll never have.  


I cut out a couple.   It'll be nice to have just another texture on the battlefield. 


Woods


Regimental Fire and Fury is one of the those rule sets that works better when areas that are Woods and Not-Woods are easy to see.  Area terrain and Not-Area terrain.  Lots of games work better that way, which is why lots of gamers use pieces of felt to define the edges of woods and put trees on it.  
I'm gonna do the same thing basically, but hopefully in a slightly fancier way.  It'll be like the difference between a plain black T shirt and black T-shirt that has a tuxedo print.  

The scenario map shows two areas of woods: Sheads' Woods and Herbst Woods.  There's also a couple of Groves / Orchards.  These have to be flexible as they go up and down elevations.  

I'm gonna use fabric as the base for the woods and orchards.  As this has shown in test peices to be flexible even after the flock is glued on.  

Test fitting the Herbst Woods.


Using the actual scenario map, and the one I drew up (see part 1, the Plan), I laid out the hills in the correct configuration and drew on the fabric with a sharpie where the woods would go.  Herbst woods goes over West and East McPherson's ridges.  The sharpie lines are hard to see in the pics I know.


Sheads' Woods basically covers most of this terrain piece.
So I traced the shape on the fabric and inside that trace drew out the boundaries of the woods


I also traced an outline of Seminary Ridge
where a large orchard sits in front of the Seminary.

Man, I still got to paint the Seminary....

That was the hardest part; just trying to ensure that scenic features would fit well on the battlefield where they are supposed to go.  


Then it was an easy matter of just painting the areaa with watered down glue.


And then laying down the flock onto the glue.
I went with a light green for Orchards, and a dark green for woods.


Leave this to dry which takes no time at all since here in the Sac area its a 104 degrees outside
every
single
day.

yes, I know I mentioned that already.  It bears repeating: it's HOT.


Then you just cut it out.


Pro-Tip that I saw ahead of time: You actually want to put the glue and flock slightly over the line / edge.  It covers up the line of course but it's easy to guess at and it's much easier to cut, and ensures that the flock goes all the way to the end.

Pro-Tip I should of thought of: Put down some wax paper or something underneath the fabric bases.  I didn't and they dried onto the cardboard and I had to rip them off.  


Two woods, 3 Orchards/Groves.
If there is time, I might spray them with some more glue and add a contrast color.


I'm pleased with the result.
The area is well defined but not a stark contrast with the base terrain.


Is it more work than simply cutting out a piece of felt or whatever?  certainly is.
Is it more fancy than a simple piece of felt or whatever? Slightly.  
But maybe it's the little extra effort that goes a long way.  Like brushing your teeth before you kiss your spouse.


Almost Done


I'm feeling the pressure of getting this all done for Pacificon in Sept.  I feel like there are a lot of little things to do and not much time to do them. The next major steps are painting the buildings and making the stream that runs through the board.   That's FORESHADOWING.  

EDIT: The wait is over.  next part can be found HERE


And The Winner is...


Thanks to everyone who entered last weeks blog birthday giveaway.  I made everyone's tickets and put them all in a big bowl.  I went to my daughter #1 and said "here, pick one of these at random..."  She said "why?"  I said "just do it, it's for a contest."  She said "I don't want to if I don't know what it's for."  

/Sigh

I went to Son #2 and said "here, pick one of these at random..."  He said "sure dad, here you go."  
Favorite child status:  achieved.


The winner is your favorite online friend and mine:

Ben Cato

Please email me so we can discuss.  


Thanks for reading
Double thanks for writing a comment.
till Next time.  

Tuesday, July 18, 2023

6 Years of Blogging


Time to celebrate another blogging birthday; this time with free stuff.  


6 Years of Mostly 


Over the last 6 years there have been a total of 159 posts on this Terrible Blog, that breaks down to about 2 post a month, which is not a great commitment when you think about it. Though my posts tend to be a little on the longer side as blog posts typically go.  It's just the style I like.  I'm in love with the sound of my own keyboard.


There has been a small variety of post topics / genres that have been discussed.  I tend to focus on something for a few months at a time as I get all involved - obsessed with it, and then move on when it hits a conclusion.  Which means there are periods where it's the same main topic over and over.  Kinda like stages of development.  Here is the Age of Sail phase.  There is the Dark Ages phase.  Great, now it's a pain in the ass Star Trek phase.  

People do charts and stats in these summary posts.  I'm no different.  

This Pie Graph shows the distribution
of past blog topics.

As you can see, it's mostly just a big waste of time. Charts don't lie. Charts are not people.

Hopefully, it's been an amusing waste of time.


Blog Death


I wonder how blogs die.  Obviously they die when the person dies, but lets not be that morbid.  I think its more that people stop posting for some reason and that reason is some form of   "effort not equaling reward."  

I'm not sure what the reward of doing a free blog would be.  I feel like I blog more out of habit now than anything.  Obviously I crave admiration and recognition; but that's more to do with my incredibly long and flexible toes than my wargaming skills.  Seriously, my toes should be famous. 

I mostly like the online interaction of everyone taking turns doing show and tell.  So thanks to everyone in this little online community for making it fun and keeping this blog of Terrible Loss rolling with your interest.   


Free Stuff


Blogging has got me some free stuff over the years.  I've done some trades ups, I've won the odd contest, Jon once just gave me some ACW Zouaves.  BW once sent me a Medal.  

So to celebrate 6 years of blogging and online community; it's time to host my own blog birthday give away!  I'm rolling in cash right now after getting lucky at the Indian casinos; so the prize will be a $30 gift card to the miniature company of your choice.  That should be enough for us historical gamers to get a box of plastic troops, and you OTHER gamers one miniature from Games Workshop.  

RULES:

People can earn entries (like tickets) for doing the following and one entry will be drawn at random for the prize.  (so more entries means higher chance of winning).

1 entry for leaving a comment on this post.
1 additional entry for identifying a past post on this blog / subject that was NOT a waste of time.  Just something you enjoyed.  
1 additional entry for paying me a compliment (I am easily bribed).
1 free additional entry for all of those that are the regular commentators that do me the favor of writing a comment all the time.  Because you're the best.

Give away will run until 7/26/23. 

I hope this will be just a bit of fun.  

-Stewart

Tuesday, July 4, 2023

McPherson ridge project (part 4: The Flock)

 where was I?  Oh yeah, singing the best song EVER..


"The ACW
known as the BEST CW,
go on and tell your crew.
That the ACW
is the best CW
for all your friends and you." 


Also, I was making terrain.  Part Three can be seen HERES


McPherson's Ridge Continued (part 4)


Though the pics won't really show it, there was some time and effort to get this part done.  I LOVE time and effort.  You don't need talent or skill as long as you got time and effort.  Yesiree as long as you got the time and put in the effort then everything is possible....

Though I've been low on time, so it's mostly been effort.  The children are in full summer mode now which means instead of going to bed at a reasonable hour because they have school early in the morning; now they stay up late every night because they can sleep in cutting into MY precious hobby time that only happens when everyone goes to bed.  I still gotta get up and go to work.  So it's been late nights for me, with Effort and Caffeine.  


Simple Painting


As we left off; the soon-to-be-hills have been sanded smooth and covered in ground texture.  Next step was simple and just painting them brown.  


Tadaa!
Brown. 

I decided that since the whole surfaces were going to be covered in flock that I really didn't need to dry brush the tops.  

I did give the sides of the railway cut a dry brush of grey.
To give it that 'cut through the earth' look.
Looks alright.  Not great, but alright.


Next step: Time to rock out with your flock out.


Flock It


There's not much to say about flocking, as I think most people know how to do it.  There are a ton of online videos about flocking.  How to get good at flocking, how to get a good flock, sometimes you watch flocking videos so you can flock yourself at home.  There are magazines and books on flocking with lots of close up pictures.  Yes, these are double entendres.  I know what I am doing.  


But just in case your a flocking virgin, here is a basic outline of the process:  


My flocking bucket.

First you create a Master Mix of the materials that will make up the base color.  And then there is the important step of writing that down somewhere.  I like a little mix of static grass and flock.    I shall record my master mix  now for all posterity (and to help me remember for later in life):

2 parts Summer green lawn, 1 part dark green lawn, 1part 2mm bright green static grass.  


Second: Cover the hill with watered down PVS / White glue.


Third: Put your master mix into the glue: 

You can buy a tool to do it,
But I like to shift the flock through my fingers over the glue,
and feel the fibers fall away while I think of moments of time from my youth
now long gone.

Where was I?  Oh, wasted youth.  I mean flocking! 

That's basically it.  Let dry and shake off the excess somewhere you can make a mess.  It's really easy. Relax.  Some men have trouble getting started in flocking because they have a lot of anxiety about the flocking being good.   

Repeat this process many nights in a row.  

All the elevations flocked.
Standing together by the fire place like a family picture on a Christmas card.  
I added a yard stick (36" long) to get a sense of scale.


Moment of Truth


I made my wargame mat YEARS ago and didn't write down what flock mix I used.  So I was anxious to get my newly flocked hills on it and see how well they all matched up.  I don't need exact, but hoped for not a startling difference in shades like super strong tan lines.  

Some parents have their children clean up their toys to teach them about personal responsibility and cleanliness.  I made my kids clean up their toys just so I could roll out my game mat and take these pictures late at night.  I am Father of the Month.


Pretty good actually.


yes I see that smear on the bottom left hill.
That's where I dropped a tub of dark flock on wet glue and forgot about it till now.
I'll fix that later. or just cover it up with a field or something.


Dare we do one more picture? as bare hills are super exciting.


It won't stay bare: there will be a river and houses and fields and fences all over it.

I think this was the hardest part, as the elevations are the biggest features and the foundation for the rest of the terrain.  Overall I think they came out fairly well.  


A Date to the Ball


I decided to attend Pacificon in September over the Labor Day weekend.  It's in the Bay Area (about 2.5 hours away) so I would travel and stay the night in a hotel for the weekend.  Something I haven't done in years and years being cheap and a homebody.  But this battlefield build is shaping up well and could be fun to bring.  

That gives me a deadline of September to finish it the battlefield.  Which should provide motivation to keep at it.  Ideally, I would like to finish it all this month of July and be able to play a game on it next month at the comfort of my own home before taking it out on the road.  

The plan also nicely coincides with the SCENARY CHALLENGE being sponsored by Dave Stone at the Wargames Terrain Workshop.  


Wasn't it?


That was a fun bit about flocking hills wasn't it?  Yes it was.  But no need to over do it.  The whole thing is not that impressive..... YET.


Thanks for reading.
Double Thanks for writing a comment.
Till Next time.