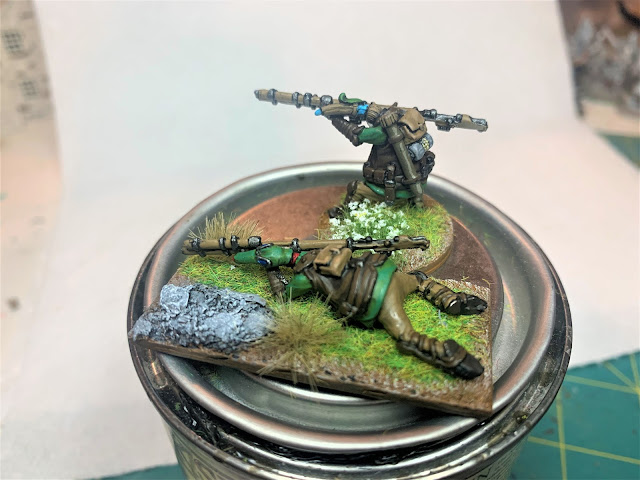
By my count, I've painted 40 miniatures in the past 2 months.
Incredible speed that is, inhuman even, Olympian.
Nobody could keep up that pace.
I certainly can't. At least not without performance enhancing drugs.
The kind of drugs that government agents take in the movies in order to withstand 'vigorous interrogation' by the enemy, because painting endless miniatures is a form of torture.
That's just a hyperbolic way of saying 'I don't like painting miniatures that much and want to do something different.'
It's terrain time. It's off to the trenches!
It's also a post that I feel like I type a lot but do very little.
WW1 Trenches (Kinda)
My "This Quar's War' project is off and running with a bunch of newly painted miniatures, but I don't have any Quar-specific terrain. While Quar are strange creatures, their technology isn't and it's basically at the WW1ish level. WWI always screams trenches to me, and to me trenches always look super cool when they go into the ground rather than sit on the table. Which means it needs to be a terrain board with foam to dig into. I've always wanted to make a terrain board and try my hand at some serious terrain modelling. When I goof off on youtube I don't watch vids on miniature painting (BORING) but watch vids on terrain making.
After asking myself the fateful question of "How hard can it be to make some terrain boards?" It was time to get started.
It doesn't have to be faithful recreation of WW1 western front; just something WW1 Trenches Kinda.
There are lots of good resources out there on the internet on how to make terrain boards so I'm just gonna copy all those people. Very little original thinking required, which is the way that I like it, because my brain has grown soft from watching too many children's cartoons with my kids.
On blogs, I will direct you toward the master of all things terrain board and foam to Anton's Wargaming Blog. There's a section called 'adventures in blue board and foamcore' full of examples and he's also currently building a trench board (extremely quickly) that I'm paying close attention to. Very close attention.
Enthusiastic Amateur Hour
I don't know what I'm doing. Don't take me for an expert or someone skilled. I'm like a teenager going on his first date after getting a lot of advice from the internet, and I'm really excited about it.
Taking some inspiration from some Quar illustrations...
Images lifted from "tales of the Breach" available as a free PDF from
https://rhyfler.com/.
I then drew out a plan on graph paper.
 |
| The plan went through several revisions. |
Main idea: the table will be 6x4 comprised of 3 2x4 terrain boards. There will be a very wide, very deep trench that runs along it; something more for travel than defense; to move troops and such, but also so wide and deep that tanks / vehicles can't drive over it (making any bridges good scenario objectives). Not sure if something like that ever existed in real WWI trenches. Branching off from that there will be more traditional defensive trenches. I'll also be adding some modular step hills with trenches that can be moved about.
In my imagination: It's not a trench system that was designed for the front lines, but a long existing trench system belonging to the Coftyran faction (Royalists) as part of the intricate border defense and the Crusader faction is moving in. The front lines have come to it.
The big trench will be 2" deep, and 6" wide.
First this board will be used for skirmish games, but with an eye that it eventually could expand into big battle games.
Time to go to the hardware store.
.jpg) |
| Indeed Boromir, indeed. |
Got myself 3 2'x4' sheets of MDF, some 2"x1"x8' wooden boards, and 2 sheets of 8'x4' insulation foam that were 1 inch thick.
--Originally I wanted 1 sheet of 2" think insulation foam, but the one sheet the store had was all beat to hell so I got the other stuff.
I had to ninja drop kick the foam sheets in the parking lot in order to break them down to a size that fit in the car. Everyone was impressed with my ninja moves I SWEAR, and no one pointed out that next time I should bring a utility knife to cut the foam like a normal person.
Construction
The first step is to create some battens / frame around the 2x4 sheets to add stability and help prevent warping.
 |
| Cutting the 2"x1" to the proper length. |
.jpg) |
| attach the frame to the sheet. |
The braces were attached with liquid nails and after that had dried for a few hours the boards were flipped over and screws were added to hold them in place. And you only see two boards because I ran out of wood and had to go back to the store to get more.
 |
Indeed.
Same goes with Wargaming Projects |
--Fun Fact: Wood does not come in precisely the sizes it is advertised. My original idea was to create a 2" frame and have the 2" foam nested inside. I thought this would protect the foam and ensure that the boards would line up better. But 2"x1" boards aren't actually 2x1 but more like 1.5 by .75. I couldn't find a board that was actually 2", go figure. Also the sheets of MDF that were sold as 2'x4' are actually just slightly bigger. I found that out the hard way, because I cut a brace 2' long brace and placed it down on the mdf sheet and found it didn't reach to the end..
So new plan. The braces will be on the bottom, and the foam will be on the top
.jpg) |
3 boards assembled and looking pretty flat.
So far so average. |
.jpg) |
| Let's start adding foam. |
Foam Stuff
I knew that for this project I was going to be cutting a lot of foam. Thick foam too. So I invested in the tool that all the terrain Youtubers and cool bloggers seem to use: a Proxxon Hotwire Cutter.
.jpg) |
tadaa!
I admit, It don't look like much. |
.jpg) |
Trying it out.
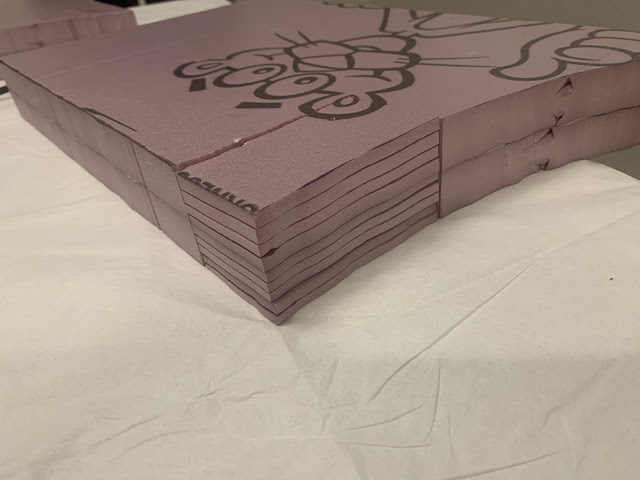
I glued two 1" pieces of foam together to get the 2" height I want.
It is SO MUCH easier to cut with the hotwire than a sharp knife.
Though that REDHOT wire is kinda scary. |
OK, I can feel you attention starting to flag. I don't blame you, and I haven't said something funny in a while. Let's rapid-fire-picture-style the rest of this post. Watch the pink foam dance.
.jpg) |
I cut 4 slabs of the 1 inch foam roughly the size of the board.
glued them together to get a 2" height. |
.jpg) |
used the Proxxon to straighten out the edges.
|
.jpg) |
Cut out the profile for the large trench.
Sketched out where the regular firing trench is gonna be.
I used some Quar miniatures to get an idea of the proper size. |
.jpg) |
| Cut that out as well. |
Well this bit is important. At some point I figured out it was easier to manipulate the foam through the Proxxon if it was in smaller pieces, so started cutting everything in half.
I'm also extremely anxious that the foam won't line up to the edge of the wooden board completely, and that will result in things not lining up with the other boards with big gaps and everything will be terrible. A tip I remembered from Mel The Terrain Tutor is that it's easier to cut things down the middle, line up the pieces at the edge, and fill the gap in the center.
.jpg) |
Building up the firing trench.
The Quar need to be able to see out of this trench.
So again, using Quar miniatures I tested what the actual height should be.
Quar a little shorter (and pudgier) than usual 28mm miniatures.
A 1" deep trench is just over their heads.
A 1/2" deep trench looks to be just about right height
that they can poke their snouts over.
|
.jpg) |
Almost lastly, cut some ramps so miniatures can travel up to the firing trench.
|
.jpg) |
And lastly for this post,
start using scraps of foam to plug big gaps in the middle.
We'll just have to trust that spackle will fill any small gaps in a later step. |
Slow Burns
This board is gonna be a slow burn, take your time, no rush project. For a few reasons:
1) As stated, I don't know what I'm doing and I'm kinda feeling my away along. Before any progress is made there is at least 20 mins of me just staring at things making thinking noises before I do anything. And I do it very slowly.
2) It's big and takes up a lot of space, so only gonna work on it on nights when I'm able to stay up late and devote enough time to make it worth yanking it all out. And there are 3 boards to make as well as some more traditional tabletop terrain.
Which means that in the meantimes, I guess I can continue to paint more miniatures.
More miniature painting.... yay I guess.
Thanks for reading.
Double Thanks for Writing a comment.
Till next time.


.jpg)

.jpg)

.jpg)
.jpg)
.jpg)
.jpg)
.jpg)
.jpg)
.jpg)
.jpg)
.jpg)
.jpg)
.jpg)
.jpg)
.jpg)